THANKS
to everyone who entered the September Challenge - Spring and Show Off Your Space.
We enjoyed looking at the variety of entries and are pleased to announce the winners for this month.
Please head to the Gallery
to check out the fabulous entries and leave comments to encourage the
crafters. We all love positive feedback. And check the blog later
tonight (or tomorrow...) to see what the new challenge will be for October.
We have FIVE winners this month. Winners,
please email the shop at info@artfullcrafts.co.nz and let them know
which challenge you have won and they will send off the prize to you. The prizes this month have come from Kaisercraft's new Mistletoe collection. We'll make up little embellishment packs for the winners of the Colour Challenge, Sketch, Spring theme and those who submitted a picture of their craft space.
1) Colour Challenge Winner
We had to give the prize to TWO ladies this month. Both of them did a great job with the colour palette. Congratulations to Jessica Toulmin and Alison Bishop!
Alison Bishop shared with us a swing card based on the colour challenge. It's cute!
Jessica Toulmin really loved the colour palette and so she submitted 3 projects this month using it. You can read her blog post here where she talks more about each project.
2) Sketch
winner
Congratulations
to Lindsey March for winning the Sketch Challenge! She's used Kaisercraft's Tea Break collection and a sweet photo.
3) Spring Entry
Congratulations to Fiona Angus for this beautiful layout of spring flowers. The colours are splendid!
4) Show off your Scrap Space
This winner was randomly drawn from everyone who sent in piccies/layouts of their scrap space. And the lucky winner is ... Lana Hamberton! Congrats to you. Your room looks really exciting!
Congratulations winners. Please email the shop at info@artfullcrafts.co.nz and let the girls in the office know
which challenge you have won and they will send off the prize to you.
Here are a few other entries for you to enjoy. We encourage you to head to the Gallery to check out the rest of the fabulous entries and leave comments to encourage the crafters! We all love positive feedback.
Don't forget to
check in tomorrow to see what the October challenges will be.
Check out Deborah Watson's Scrap Space. I love the use of cubby holes.
Jenny Moulton has been scrapbooking the meeting of older and younger generations.
Shona Chambers has been busy making cards in spring-like colours.
Sandy Ang has been inspired by the colour palette. What a fabulous layout!
This is Jayne Barnett's exciting looking craft space!
Shona East's layout was based on the sketch challenge. She's used the new Kaiser Stars template for the background. It looks great!
Tammy Dale-Hodgson's layout is based on the sketch and she's had a play with using a white background and letting some subtle colours come through. Super job!
Have a great week and thanks everyone for entering.
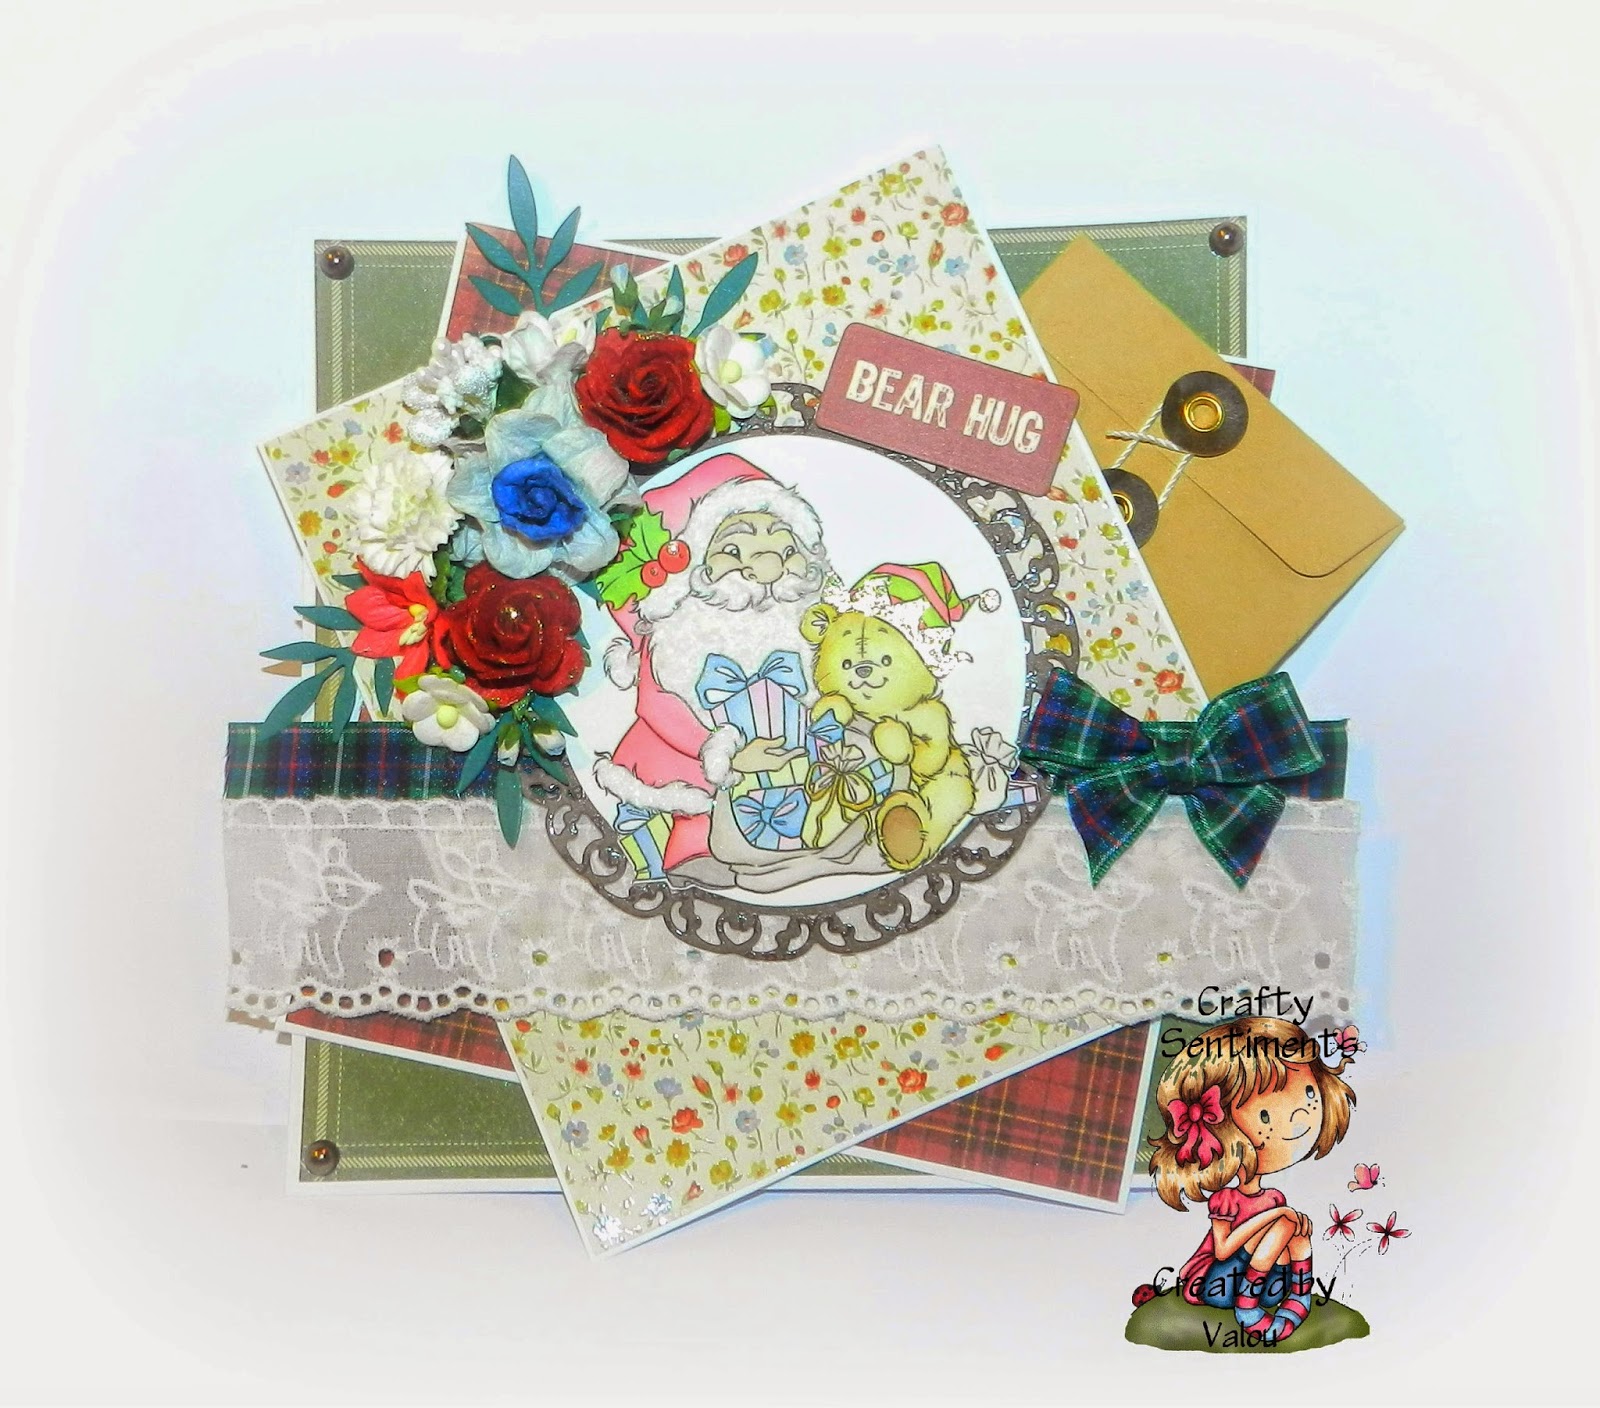
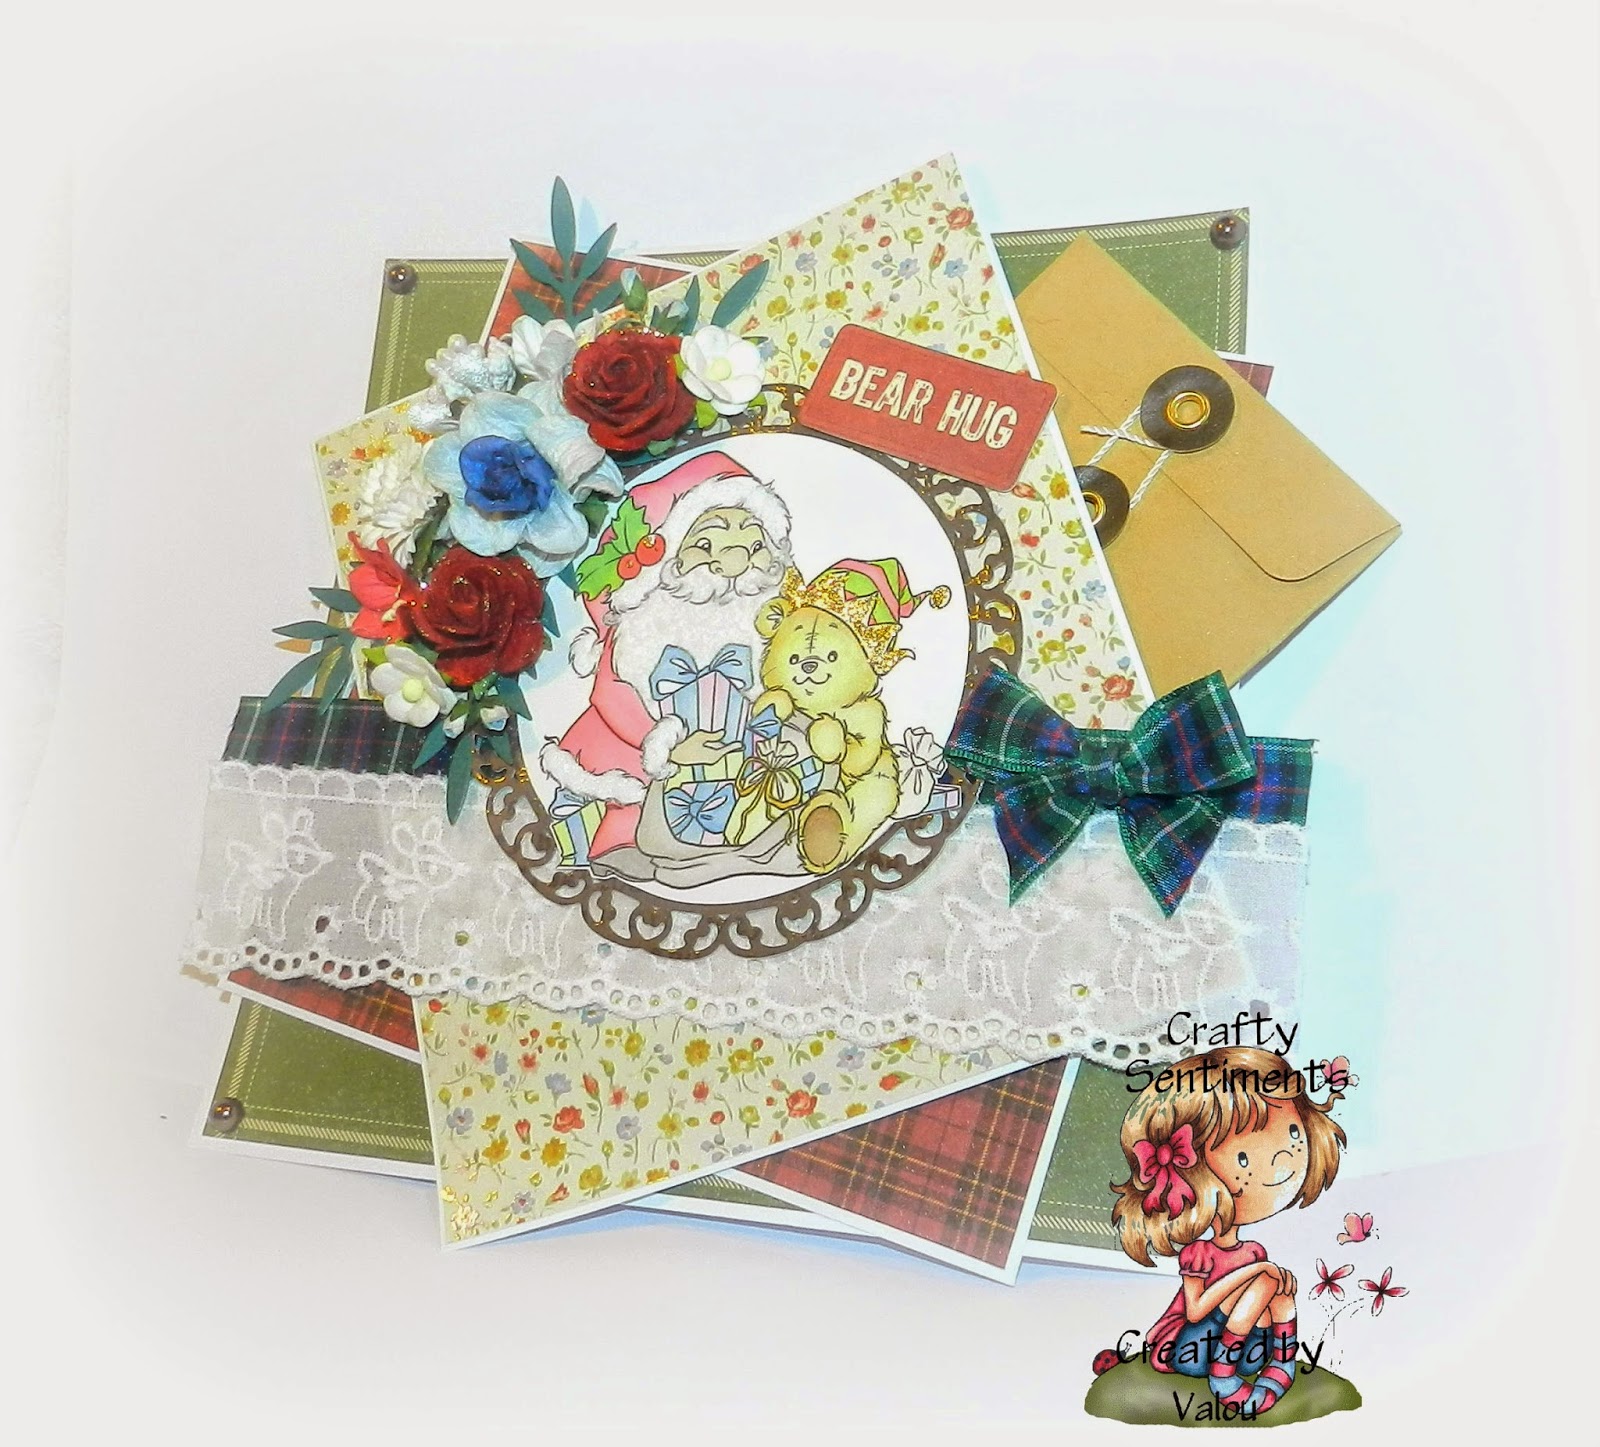
Betsy here this morning to share some of the Yuletide cards that I put together for the Artfull Craft's Kaiser release, which was a few Fridays ago. Christmas cards seem to be the order of the day and this is one collection that was not difficult to use. As I have said before, I am rather fond of all vintage style papers and this is no exception. The colours are just super! Here's the reveal ladies.
That's it today ladies - do hope I have given you some ideas for your Christmas cards. Not many days now 'til SANTA arrives!!! I must admit I do prefer making cards without the Christmas gentleman, but sometimes you just have to fall in line with what's required! My arm gets twisted you know and I really am a push-over, as Lizzie would say!!
This collection is available at Artfull Crafts but I must say, you will have to be in quick.
Thanks for taking the time to check this out, happy crafting to all and many blessings,
Good morning everyone in blogland. Its been a long time since I checked in (my sincere apologies), I have been busy playing mummy to hundreds of babies on the farm.
BUT......I have also had time to play with the new releases from Kaisercraft in fits and starts.
This first layout, was made using the Kaisercraft Mix and Match range found here
I enjoyed the versatility of this range.
Page One, I used splattered paint in the background, then cut apart several of the sheets to get individual elements to adhere to the page. Made good use of the sticker sheet on this one too.
Page two also featured a paint effect in the background, parts of the sticker sheet, and pieces cut from 12x12 sheets
A perfect collection for those blokey type photos we all have. Perfect for the men in your life who love the great outdoors, or for those of you who getting back to nature and enjoying a spot of camping.
For this page, I used lots of layered pieces of paper to showcase a photo I took in Scotland earlier this year (photo is a lit lop sided sorry!....new laptop and have not worked out the straighten tool yet lol)
Any how. These are a few of the things I have been up to in the craft room.
Which leads me to the dratted photos of my space! As you know this month we are sharing our crafting areas, wherever that may be.....in a huge purpose built room, or from a shoebox under the bed!
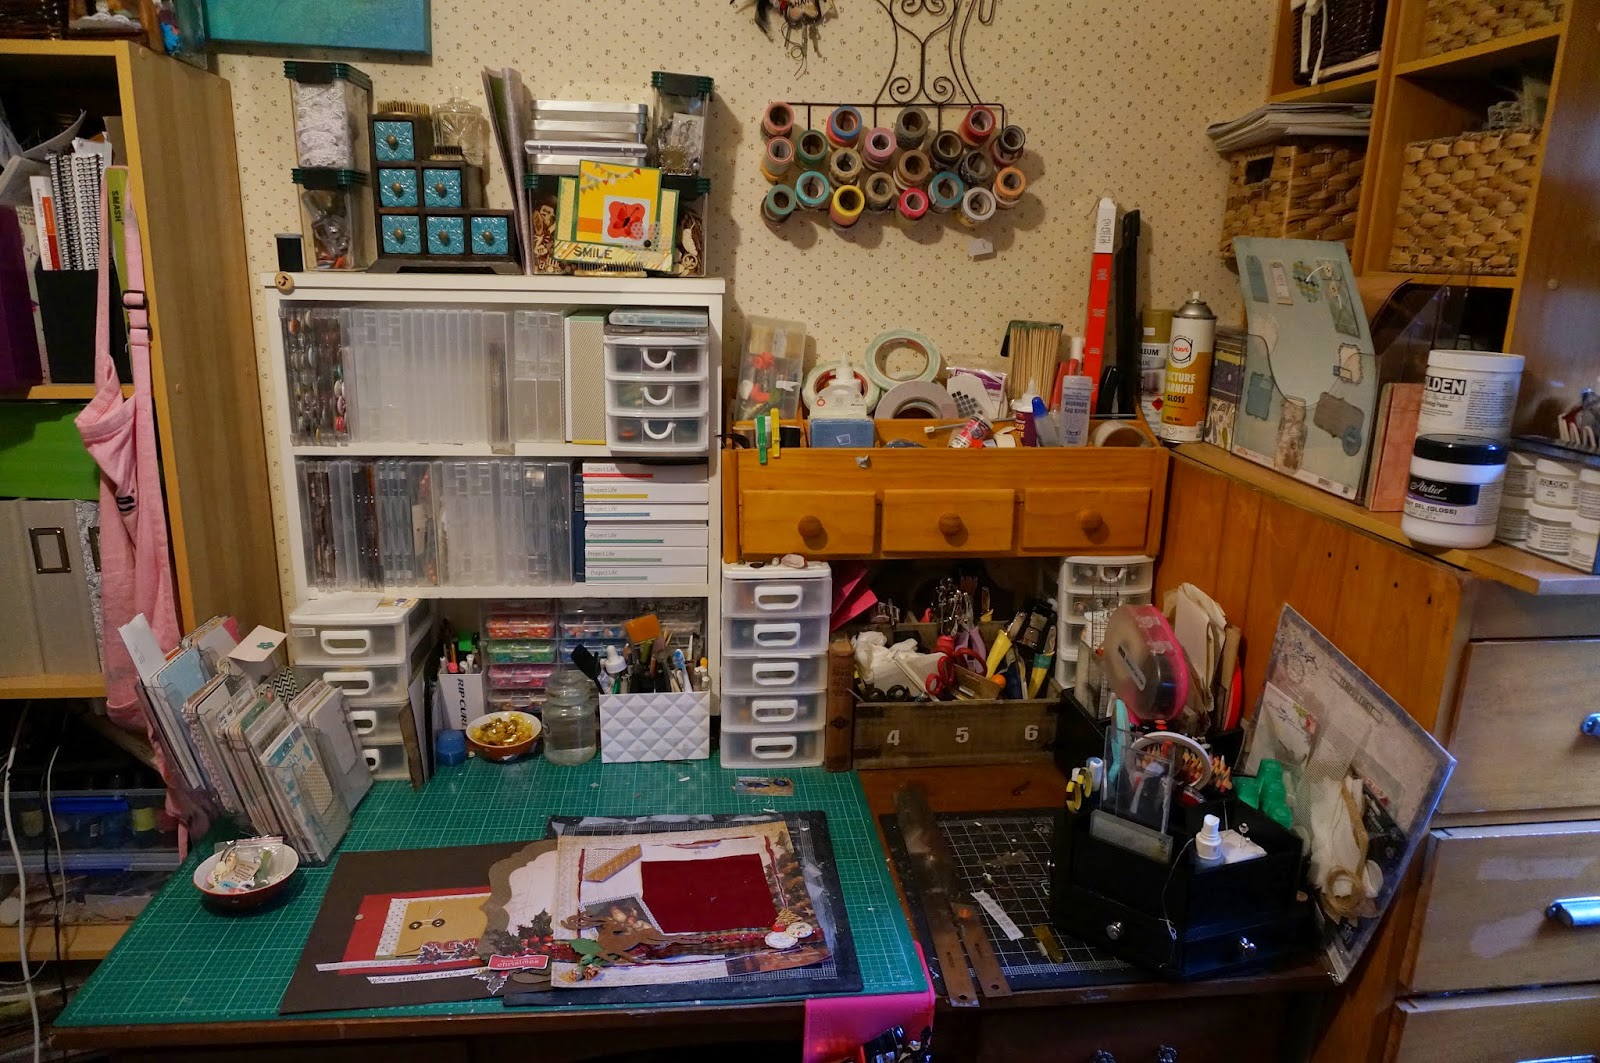
Heres my workspace. My desk in all its glory!!!!
This little container I have sitting on my desk to hold little 6x4 lettering or Project Life cards to add to pages. Its actually a "flyer holder" that I picked up from the Sallies for about $5. I have two of them, and really like them.
I have used the Cropper Hopper system to store papers and card stock for years. I love this system. You can get the girls at the shop to order in the vertical paper holders, and i recently bought a new type, which I love storing kits in.
My room is quite small, so I make the most of these bookshelves I bought from the warehouse stationery. they are great because they hold 12x12 containers, with room to spare.
Lots of people seem to struggle with storage of things like die cuts. I use these containers to sort my die cuts into colour coordinated groups. the 6x4 containers store a heap of die cuts, and keep them all tidy......most of the time !!!
I could not let this blog post go by, without showing you my two darlings!!!!! The typewriter from the early 1900s has a larger than usual carriage, and this means I can type directly onto my pages if I want to.
It sits atop an old filing system I bought from a second hand shop. I have several of these in my room. These ones are the perfect depth and height for my thickers! Love that I can pull open the drawer, and grab the colour of my choice.
I also use another set for photo storage. (This really needs to be sorted through and lots ditched.....who needs 57 photos of one child in the school play )
Since these photo have been taken, I have made new curtains for my space, and hope to have a paint job done in the summer.
Its not a flash harry room...... it is what it is......and its my haven.
Happy scrapping everyone.
(Come back next week to see what I have been doing with pocket pages!!!)
Good morning! I hope your Saturday has started off well! :) It's Lisa here, with a few pictures of my craft room to show you, to tie in with this month's theme of "Share Your Space." I always love seeing pictures of where other people create their arty masterpieces, and I'm always looking for new inspiration when it comes to storage ideas for supplies. When I win Lotto (haha, any day now, I'm sure!) I will hire an expert to come and redesign my creative space for me complete with all kinds of useful and innovative ideas to ensure everything is at my fingertips when I need it. (Every crafter's dream, right?) In the meantime, I'm making do with my own eclectic space, where everything does have a place, even if I do struggle to remember exactly where that place is. ;)
This is the view of my room as you walk in-- nice big double glass doors that lead into the garden, and plenty of wall space, which I have covered with favourite posters, repurposed pictures frames, photographs and artwork made by myself and fellow artist friends from around the globe. My storage is an assortment of metal filing cabinets (I have two), several sets of wooden bookcases from The Warehouse, and various sets of plastic drawers.
In this shot you can see an essential item on my desk on the right-- my stereo. I love to have music playing when I'm in the creative frame of mind, and I admit that there is plenty of chair dancing that happens. ;)
This is my desk area, with plenty more artwork on the walls surrounding me. It's nice to have eye candy for inspiration whenever I look up from what I'm doing. :) My desk itself is huge-- it's an ex-Post Office desk that I found on TradeMe for the bargain price of $80. It has around 9 huge deep storage drawers on the far side, as well as a cupboard on the opposite side (on the front at the left of the picture.) Because it's so huge, I'm able to keep my most-used supplies around the edge of it so that they're always within easy reach. :)
Lastly, an aerial view of my desk, taken as I stood on my chair. You can see some of those most-used supplies I mentioned-- Project Life cards, wooden veneers, inks, sprays, double-sided tape, paper scraps, my tiny attacher, and a myriad of pens, pencils and glue. The layout-in-progress is a 12x12, so I have plenty of space all around me as I work.
There's also a huge storage cupboard to the left of my desk (not pictured) which houses all of the overflow and other bits and pieces. I desperately need to get in there and have a really good sort out, but there's a very real danger I might get lost and never be seen again. It really is THAT full of stuff. ;)
And that's it! I've actually just spent the past couple of days rearranging and tidying this space up, so it's nice to be able to show it off when it's looking better than it has in a while. As well as being more organised, it's inspired me to spend more time in there, pottering around, which is always a bonus! :)
Thanks so much for looking, and don't forget to share your creative space as well!
Hi there - Christine here again! You may have seen on my craft desk in yesterday's Blog post a couple of cards I have been working on - well here is a close up of them ......
I made 4 of them all up as my daughter requested 3 Baby cards for friends having babies and so I thought I would make an extra to have as a spare. Sometimes I love to mass produce cards and just individualize them by changing a colour, and or the embellishing. For these cards I used 4x6 Simple Stories Snap cards to make these 5 3/4" square cards. I added some Studio Calico wood veneer people/hearts and some Brads . A bit of stamping and I was done! So easy using the 6x4 mix and match cards.
I have used a We R Memories 12x12 page with 9 x 4" pockets. I made my 4" squares from the Basecoat paper pad and rounded the corners. The Collectables were used to embellish each pocket . I also used some wooden stars and banner pieces from Studio Calico found here.
I have also a couple of photos of my craft room to show you....
This is my Project Life area where I keep all my bits and pieces. My 3x4 and 6x4 cards are in 7l systema containers I have one for Project Life cards, one for Snap cards and one for Captured Moment cards. My embellishments etc I have in the small systema containers.
This is my work area/desk - can you tell I use the green tombow glue a lot!!!
Hello! Lisa here, with something a little bit different this time. Recently I've been playing with inks and sprays on layouts, and today I have a couple to share utilising both, along with wood veneers and assorted elements cut from various papers. These kinds of layouts are probably my favourite type to create: lots of white space, and making use of tiny design features taken from a wide range of papers.
I used white/cream cardstock for the base of both layouts. On the first (below) I misted some ColorShinespray over a Heidi Swapp stencil. I then decided where I wanted to place the photo and applied a layer of Tim Holtz distress stain as a background. Once the photo was stuck in place, I added the other assorted embellishments, moving them around until I was happy with the placement before adhering them permanently.
The second layout is very similar, just with a little less spray (for a more subtle effect) and more photos. The Tim Holtz distress ink was again used as a background anchor for the photographs, and as I wanted a watercolour effect, I dipped a brush in water and gently painted over the edges of the ink before it dried. The images were then stuck in place over the top, and the other elements added. I used a selection of curved shapes to echo the round photo to bring a little coherence to it all. The Studio Calico wood veneers add the perfect finishing touch. :)
I hope this shows you what can be achieved with inks and sprays-- they're a lot of fun to play and experiment with, and can produce some great results! It's also a fabulous way of using up leftover paper scraps that you can't bear to throw out. (or is it just me who has a giant stash of those? )
As always, thanks for looking, and have a wonderful day! I'll see you again later in the month. :)


 1) Colour Challenge Winner