Congrats and THANKS to everyone who entered the March Challenge - Autumn Adventures. We hope you're enjoying a relaxing Easter weekend - and enjoying what feels like summer temperatures down here!
Please head to the Gallery to check out the fabulous entries and leave comments to encourage the crafters. We all love positive feedback. And check the blog again tomorrorw to find out what the next challenge will be.
We have 3 lots of winners this month. Congrats to the following people:
1) Overall Challenge Winner
Congrats toTeryl McKenzie. This layout made us smile!! What super fun you must have had on that photo shoot. You've won a $50 prize pack of autumn coloured products - orange/red/yellows.
Teryl says, " So happy to finally scrap these fun photos... had a blast in the leaves, Cornwall Park, Mothers Day 2012"
2) Sketch
winner
Conrats to Tania Naldrett for your fun take on the sketch. Tania says, "The layout is mainly Kaisercraft Tiny Woods because I love the line and
because since we moved to NZ from the UK I really miss the squirrels
scuttling
in the leaves."
We love the way you've made the sketch work in with the tree shape. Tania is also a first-time entrant! You've won a $30 pack of Kaisercraft's new In the Attic product.
3) New entrant winner
Congrats to Wendy Crowe. Wendy submitted a layout for the sketch (it doesn't have to relate to the monthly theme) and an autum layout and this is her first time entering the Artfull Crafts Challenge. We look forward to seeing more of your work! Congrats ...... you've won a $20 gift voucher from Artfull Crafts.
Wendy says, "HI! First
timer here! I love that you are celebrating Autumn and we are just
ending Winter. I still have tons of Autumn pictures, so this was a great
challenge! I used some older felt stickers, paper stickers and a few
paper leaves."
http://disneydarling07.blogspot.com/2013/03/autumn-blessings.html
Judging was pretty difficult this month. Here are a few other entries for you to enjoy and we encourage you to head to the Gallery to check out the rest of the fabulous entries and leave comments to encourage the crafters! We all love positive feedback.
Digital Layout by Patricia Manhire
Butterfly Easel Card by Alison Harris
Double Layout by Leigh
Sketch Card by Diane Robertson
Autumn Layout by Fiona Angus
Autumn Birthday Card by Janet O'Brien
Check out the rest of the entries here and have a super Easter!
Hi everyone Jo here with a layout for Artfull Crafts using In the Attic from Kaisercraft. This is a photo I took on a family trip, it was so relaxed that I really wanted to use it for this page.
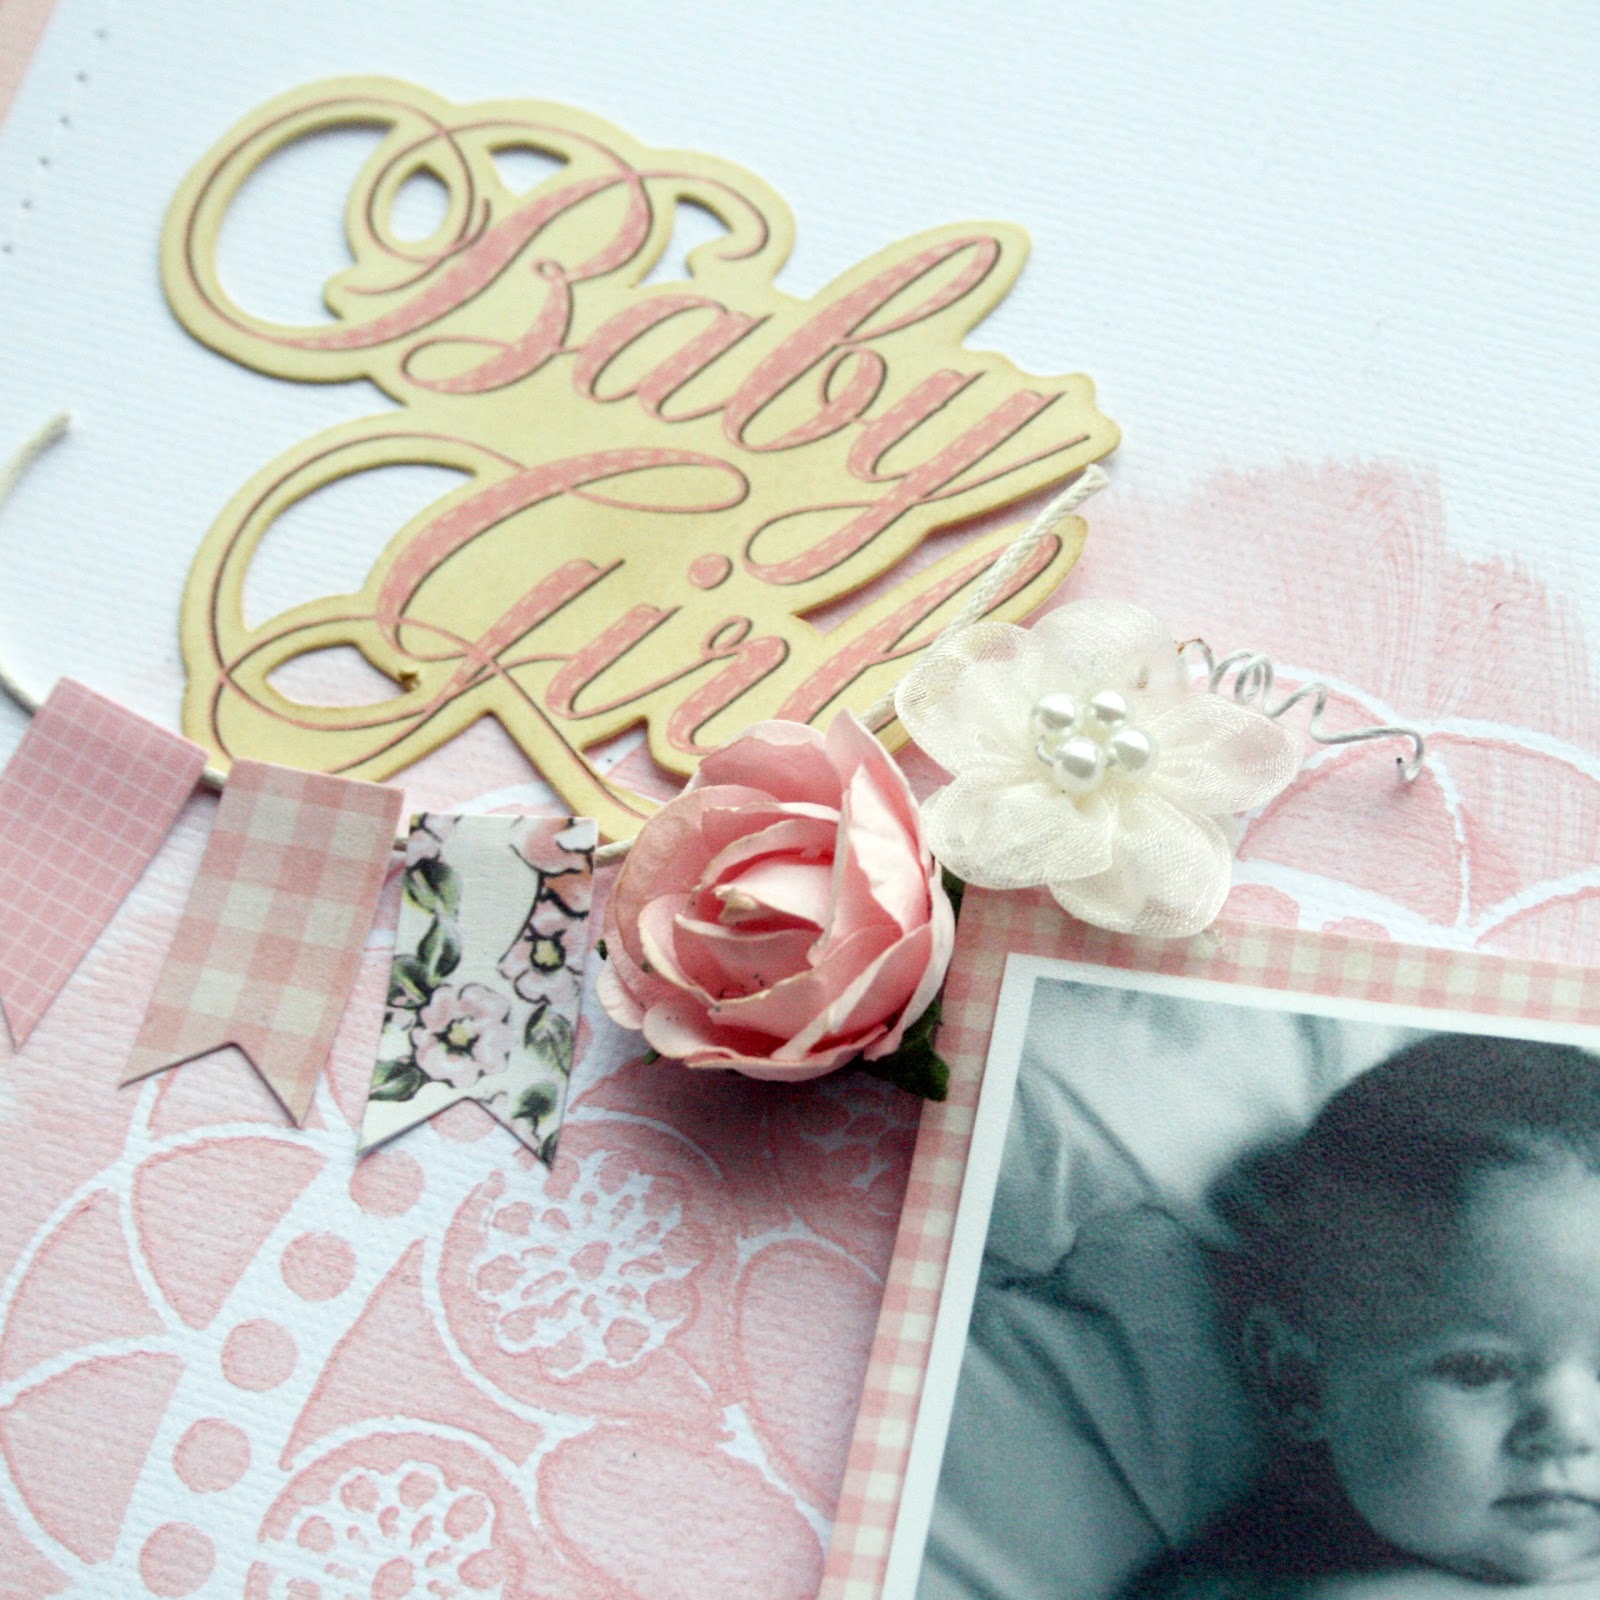
Hello! Teresa here to show you some porjects I made using the beautiful range of papers from KaiserCraft called Bundle of Joy. I think I'll be stocking up on this range - it's so nice to have some on hand for those exciting occasions when a new life comes into our world.
First up is a layout:
This is my daughter Rachel when she was just six weeks old. I have used these photos over and over again for layouts - in classic black and white they match anything.
I started this layout with a KaiserCraft stencil and some pink paint. I cut about 1cm from the edges of the white piece of cardstock and machine stitched it to a piece of pink cardstock. Then I used pieces of patterned paper from the Paper Pad to mount the photos, and bits and pieces from the Collectables pack to embellish here and there. This range also comes with Sticker Sheets - that's where the pennants for the banner came from. The wooden embellishments for this range are just too cute! All they needed was a little brown ink sponged on them to help them pop.
All the layout needed to finish it off were some flowers and a title (from the Collectables pack).
I also made a card for a friend of mine who has told us she is having a boy:
but because you never can be 100% sure, I thought I'd make a pink version as well, just in case:
I hope you're all enjoying the Easter break. I'm loving the extra time with family for sure!
Hi there! Teresa here showing you a great idea for when you want to present a card that contains a gift. Here's my double pocket card:
I will be using this as a wedding card, so my double pocket card contains a couple of tags for us to write messages ato the bride and groom:
You could also pop in vouchers, cinema or concert tickets, a little hand written note, a flat little chocolate bar, cash etc. The possibilities are endless!
With Valentine's Day being last month, there are lots of love-themed papers and embellishments around which are perfect for making wedding cards. I have used a sheet of 12x12 Love Notes paper by Pink Paislee for the card, and some Polka Dance on the tags. I also used some of the gorgeous stickers on the Secret Crush sticker sheet. The flowers are by KaiserCraft.
If you're interested in making your own double pocket card, I'd direct you to YouTube, where you'll find dozens of step-by-step videos. You will need to start off with an A4 sized piece of double sided paper, make a couple of cuts and folds, and that's it! They really are easy to make.
For these first 2 cards I have cut out black silhouettes using my Silhouette Cameo, then I have layered them up onto the lovely Bundle of Joy 6x6 papers. For the card bases I have used black card stock to tie in with the black silhouettes. I have used black bakers twine from Papervine - this twine is such a fabulous quality! Liz is now stocking this in the shop! Some stickers and Collectables to embellish.
Another card using a black silhouette, this time for my card I have used my new Spellbinders Elegant Labels 4 - I cut out the base with the largest die and the frame is using the 2nd die with the inside of the frame cut out with the largest Label 4 die. Love how Spellbinders have brought out these matching fancy dies to go with the plain ones! The sentiment is on a banner from the Collectables as is the butterfly. I love adding these kaisercraft rhinestone flourishes to butterflies.
Last of all is a cute basket I made with the same papers, I have filled it with Easter Eggs especially for you me! (Must change the sign!) The basket instructions can be found at Waltzing Mouse Stamps. I hope you all have a lovely Easter and that you get a cute basket of eggs - even if you have to make your own like me!
Betsy here this morning to share a couple of Graphic 45 cards, using the French Country Collection.
I say it every time I work with Graphic 45 - I do love the vintagey feel of these ranges. The last two collections are just gorgeous.- French Country Collection and Secret Garden. Artfull Crafts sell both these ranges.
Both these cards are 5 1/4" square. They can be viewed at the shop as I am going to take them in so as they can be displayed with the papers.
Now, as we celebrate Easter next weekend and we had a day together with the group, at Ashburton on Saturday, and the challenge was an Easter card, I thought I would show you the one I made for the challenge. I really do not do Easter cards usually, so this is a one off!
Again remember the challenges at Artfull Crafts - it is always lovely to see what can be achieved and what different ideas you ladies come up with. We love seeing your projects.
May you all have a blessed and safe Easter weekend.
What a joy it is to celebrate our RISEN Saviour!
Hello, Tracy here to share with you another card using Bundle of Joy collection. This time I dusted off my copics and coloured to my hearts content. I know I have probably said it in my previous post.. but these colours are great in this collection.. so soft and pink!!
Liz has some wonderful lace in her shop, just right for baby cards. And below is a close up of those adorable little flags that are stickers in the Bundle of Joy collection.
Hope you are all having a great weekend, before I go.. don't forget our theme this month - Autumn Adventures. You still have time to enter.
Howdy! Teresa here to remind you that you've got about a week to get your entries in for the March Challenges. You can find all the information on how to get yourself in the running for a prize here.
I thought I'd give you some Autumn inspiration, and KaiserCraf't's In the Attic range is the perfect choice! Beautiful rich, dark browns teamed with red and bright green. Mmmmm....
Here are a couple of simple cards using some of the papers from the 6 1/2 inch pad, Collectables, a bit of co-ordinating ribbon and the Windsor stamp.:
This is another card that I decorated inside and out:
I had some of the drawers open with the help of some foam tape:
and here's the inside:
Thanks for stopping by today. Hope I've inspired you to enter our March challenge!
Hi it's Sandy, sorry I've been gone from the blog for such an age. I'm thrilled with the new arrivals the store is stocking this month and have placed a big order for the Crate Paper and American Crafts. Can't wait to start crafting once my package arrives in Singapore. In the meantime, here's a card created with just one piece of Amy Tangerine Yes Please Currently paper.
Simply cut apart the journalling cards and layer four of them onto cardstock. For texture a little embroidery floss is wound around the top and bottom. My "celebrate life' sentiment is cut from the 1/2" label strip of a KI Memory paper but you can easily create your own by stamping onto grid paper.
If you love primary colours in a soft water-colour finish than check out Amy Tangerine's Yes Please collection. It's such a happy, fun set of supplies to work with.
Supplies : Amy Tangerine Yes Please Currently, KI Memories Flashback Blocks of Time, green embroidery floss
Hi everyone, here is part two of my metal series using Twiddleybitz
chipboard and working in with Artfull Crafts Autumn theme. This card was made for a friend. I wanted to make something
really special, so I went to work.
Firstly I embossed a metal sheet, then I ran the sheet back though the
embossing machine, with these three chipboard leaves under it, the
embossing has been undone. I coloured the sheet with alcohol inks, and
adhered to cardstock.
I used gesso on the maple leaf, and layed the other leaf over the top, this made a pattern on the leaf.
I then coloured with alcohol inks.
I made this set of three tags using metal on the first, embossing and
distress inks on the second, and then stamping this fantastic saying on
another tag (a Darkroom door stamp) and inking the edges.
I used alcohol ink on a white gloss tag, then stamped it with adirondack ink (Darkroom door stamp). I coloured the Twiddleybitz small chipboard frame with glimmer glam, and distress inked it a bit. I glued the frame on to the tag.
Time to put it all together.
A few embellishments to add some more depth to the card, roses, a bow,
and some maple leaves. That is an acetate leaf in the background.
My finished card, I used Bobunny paper for underneath it all, and
mounted the metal on to brown cardstock. I sprayed muslin and tied it
to the tag. Then I had much pleasure giving my friend the card, and she
loved it, she is also a crafter, and I knew that the time and effort
would be appreciated all the more.
Hi everyone, since the theme for Artfull Crafts is Autumn I thought I would show you a way to make a autumn page with out any autumn paper. This is a layout I originally did for Twiddleybitz in Australia, and I have already had this on my own blog Imagine If... so if you are a follower of my blog, you will have seen it before.
For this layout I used metal strips, and autumn photos I had of my daughter Sam when she was
little.
This page was created using metal that I coloured coppers, browns and
oranges. I embossed the sheets of metal in the cuttlebug, and then
coloured using alcohol inks, then cut them into strips and placed them
around the page, keeping a fairly straight forward pattern.
From here I coloured a Twiddleybitz frame
with glimmer glaze, and glimmer glam. The frame which is 6x6 was
adhered to a piece of card stock which I cut in half, and then
folded in half again, I then used gaffer tape to adhere another piece of
card, which gave me more pages, and then I decorated with a piece of
old Bobunny paper that I have been saving for this project. I decided three
pages was enough, and ended up cutting the final piece of card off, and
making a small photo tag on top of the final photo.
This way I managed to get 4 photos onto the page. I added a tag with
the word autumn to pull the pages open. I then coloured muslin with
glimmer mist for a sort of ribbon embellishment, and then added some
Angelina leaves which I cut using sizzix tattered leaves die, also some
acetate coloured with alcohol inks and die cut. I added prima roses,
and some paper leaves and finally some bling to finish the page off.
Can you see the leaf at the top of the picture with the pearls on it, this is a Twiddleybitz maple leaf,
which I covered with Gesso and allowed to dry. I layered one of the
other leaves in the packet over the top, which gave me a great imprint
on the leaf, when it was dry I covered it with alcohol ink in various
autumn colours.
As you can see they look pretty realistic. I only used a few pieces on
this project, I also made a card, and you will see that tomorrow.

 , s
, s

 2) Sketch
winner
2) Sketch
winner


.jpg)